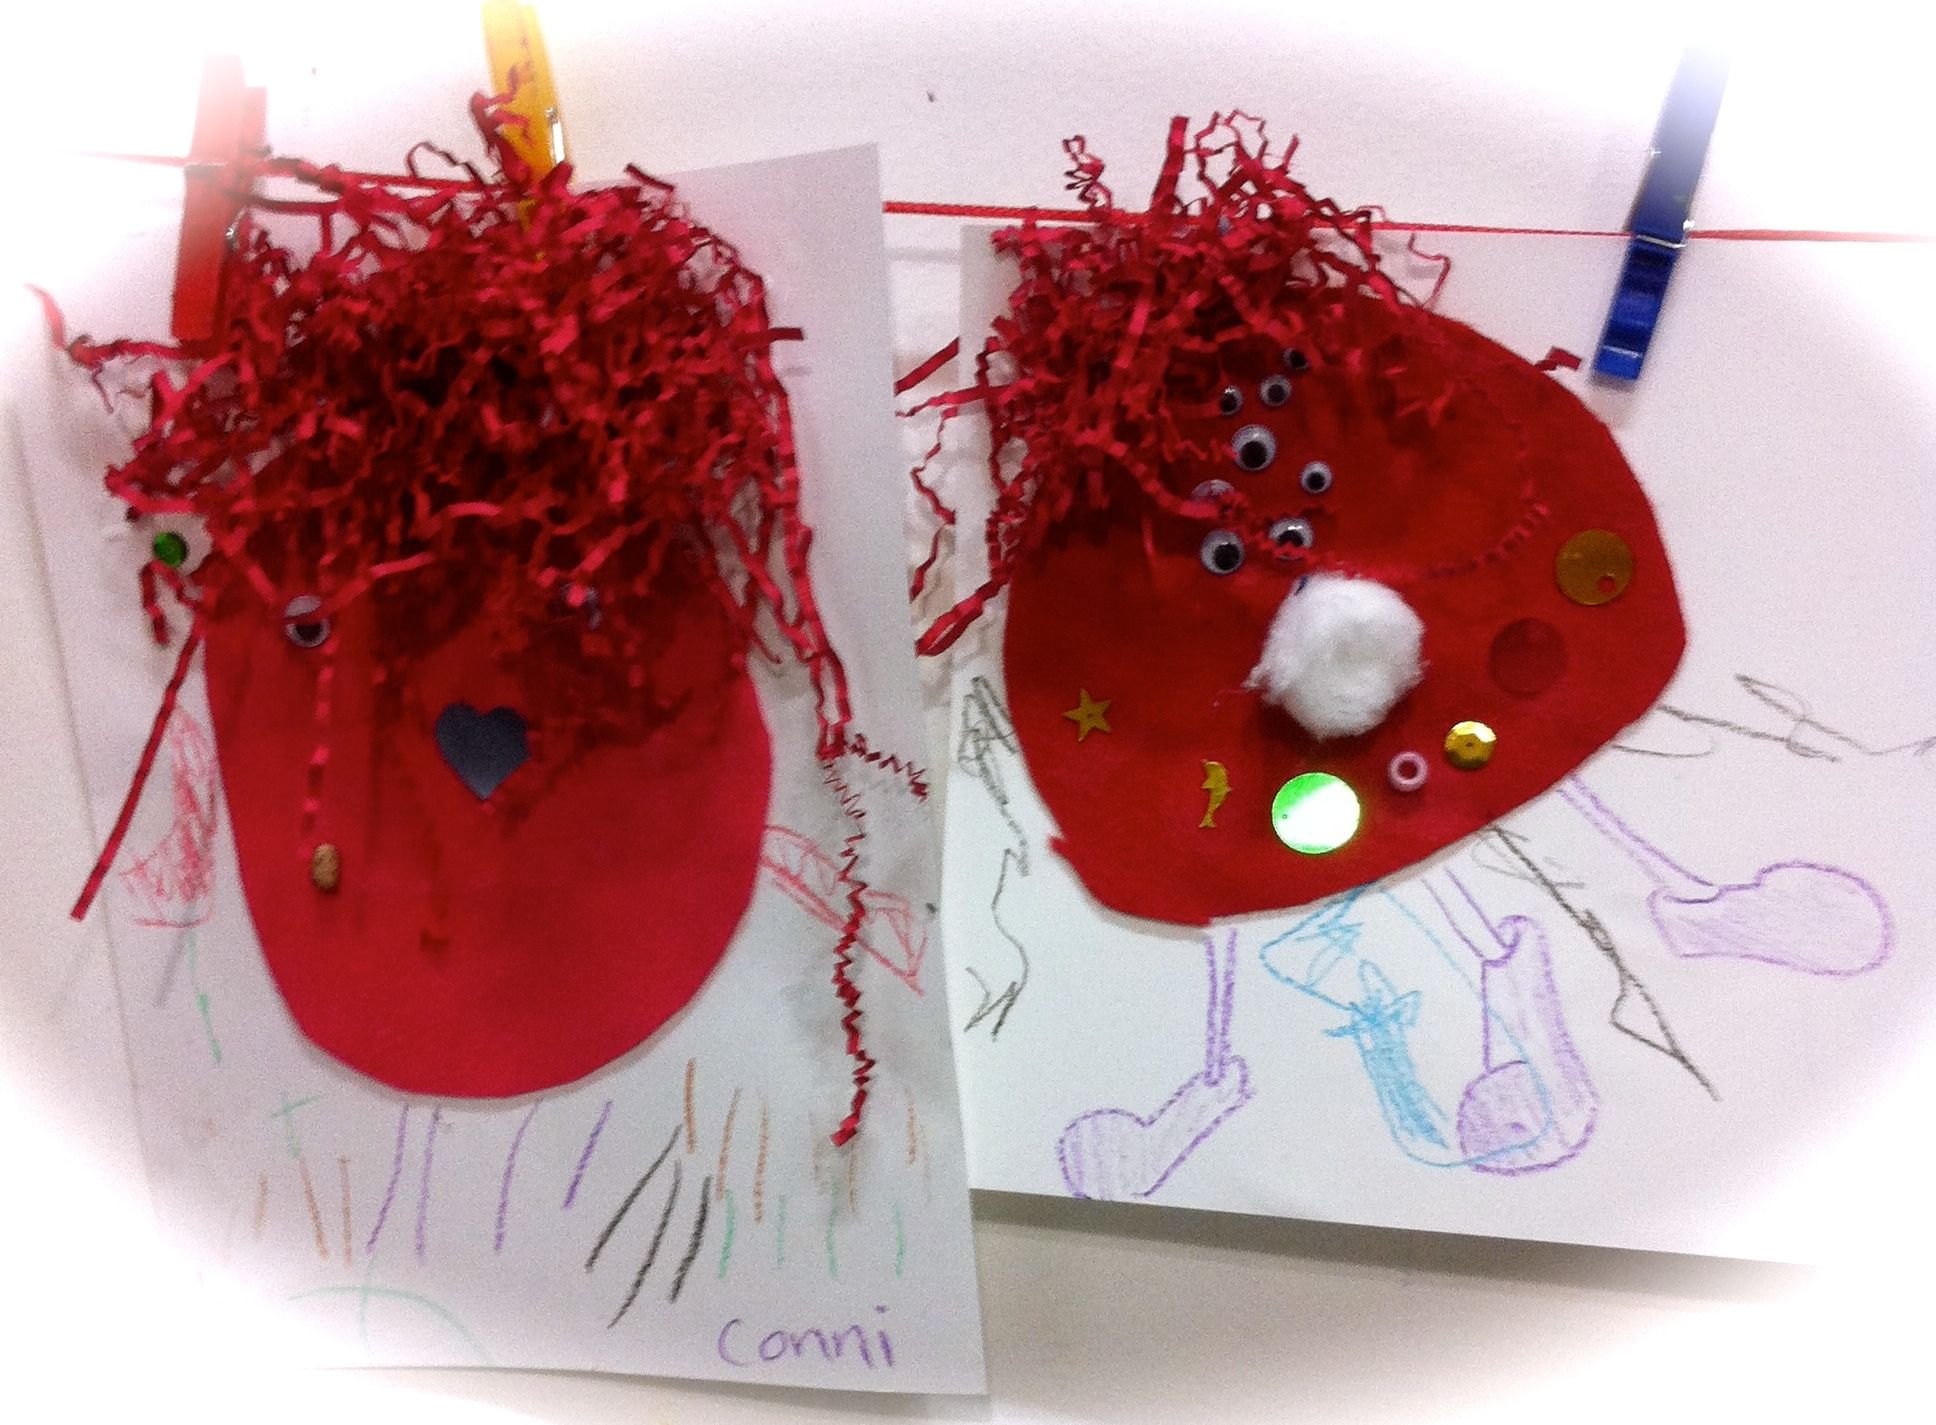
Silly Scrap Monsters
“Start where you are. Use what you have. Do what you can.” – Arthur Ashe
This quote got me thinking. Instead of doing my weekly craft supply run, what could we create using what we already have? And here, with some help from my favorite toddlers, the Silly Scrap Monsters were born!
Step 1 – Use an old piece of fabric or cloth for your monsters’ bodies. We had leftover red felt, which we haphazardly cut into an ovals, and it worked perfectly. Then glue each down on a separate piece of paper.
Step 2 – Add additional scrap material to give your monsters personality! Old easter basket grass served as our fur. Extra googly eyes and a spare cotton ball nose helped our creatures along. Then a medley of found gems, stickers, and beads created a silly monster smirk!
Step 3 – Use your crayons to play with adding some limbs. Yup, our monster on the right has 3 legs and 3 tails. Triple the silliness!